Creating products as a vendor After your vendor registered on your marketplace, they can easily create products and customize them from an intuitive dashboard.
So check out the documentation to know the process of creating products:-
Create a product from the Vendor dashboard
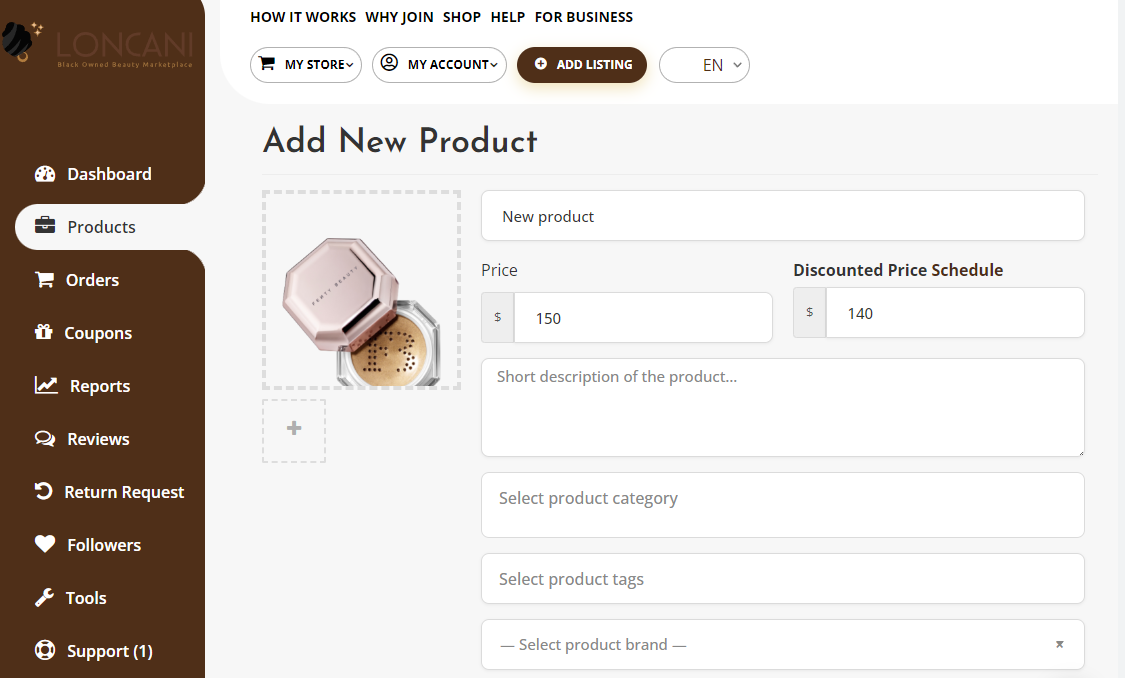
To create a product, navigate to the vendor dashboard. And then click on Products from the left menu. After that click on the Add New Products button from the top right corner.
You'll get a new window where you will be able to create a new product giving all the details only.

Basic Details
The common information about a product are the title, price, description. Discount price is optional. You can even schedule discounts for a certain amount of time. You can enter a starting date and end date to apply automatic discounts to your product.
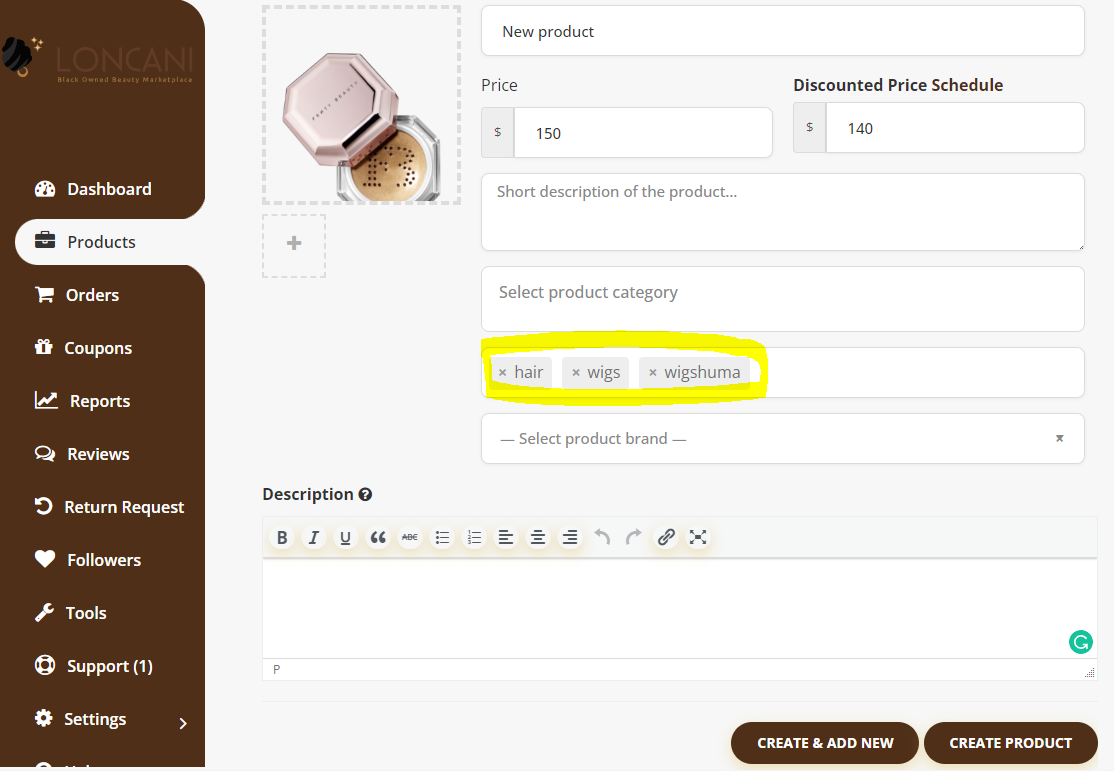
Both the categories and tags have to be created by the admin. The vendor can only select them from the frontend dashboard. Because allowing the vendors to create categories and tags might result into duplicates.
Select Category
By default, category selection is singular. That is why there is a drop-down field to select a category. This should be the standard-setting. Because according to Google Webmaster Guidelines and other SEO and UX best practices, it is recommended to have only one category assigned to a product. If you need to show your products based on multiple factors or for searching or sorting feature, you can use tags.
Vendors need to select the category from the drop-down.
If you really need multiple categories in a single product, then it can be enabled from wp-admin → Settings → Selling Options → Category Selection.
Admins need to create the categories from wp-admin→Products→Categories.
Create Tags
vendors will be able to create new product tags from the vendor dashboard. Previously, vendors were only able to use the tags predefined by Admins from wp-admin→Products→Tags.
Vendors click on Vendor Dashboard>Product>Add New Product. Under the Select Product Tags field, add a tag and Press Enter. The word or phrase will be added as a separate tag.
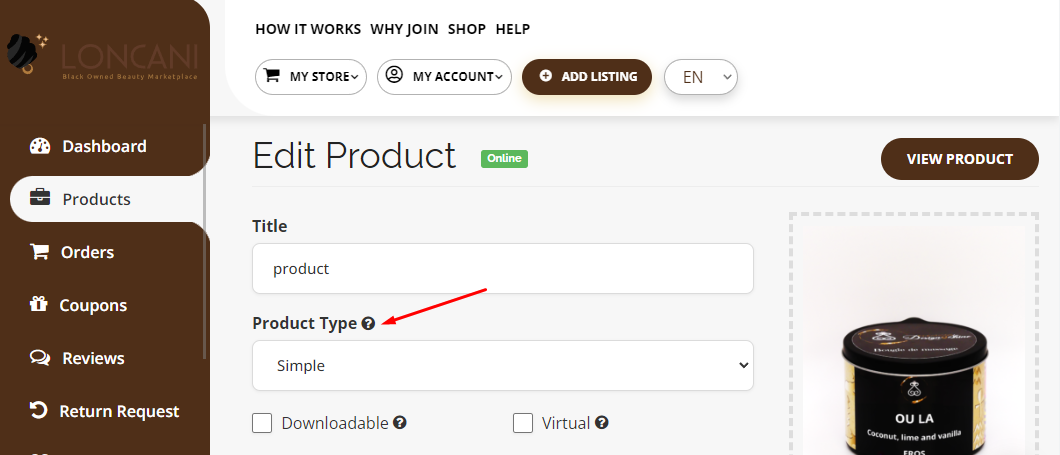
After you have provided all the required information, click on the Create product button. It will create the product and redirect you to the product edit page, where you will be able to add more information about your product. If you want to create the product and add another one immediately, click on the Create & add new button.
After you have been redirected to the product edit page, there is an option to select a product type. You can select either a Simple, Variable or Grouped product. Check this article to know how: Products type
Inventory and variants
This section holds a bit of complicated information. None of these fields are mandatory. If you do not need to add stock quantity and your is just a simple product, then you can totally skip this section.
But if you are creating a downloadable product or selling a dress or t-shirt, which has multiple sizes, then you should read this section carefully.
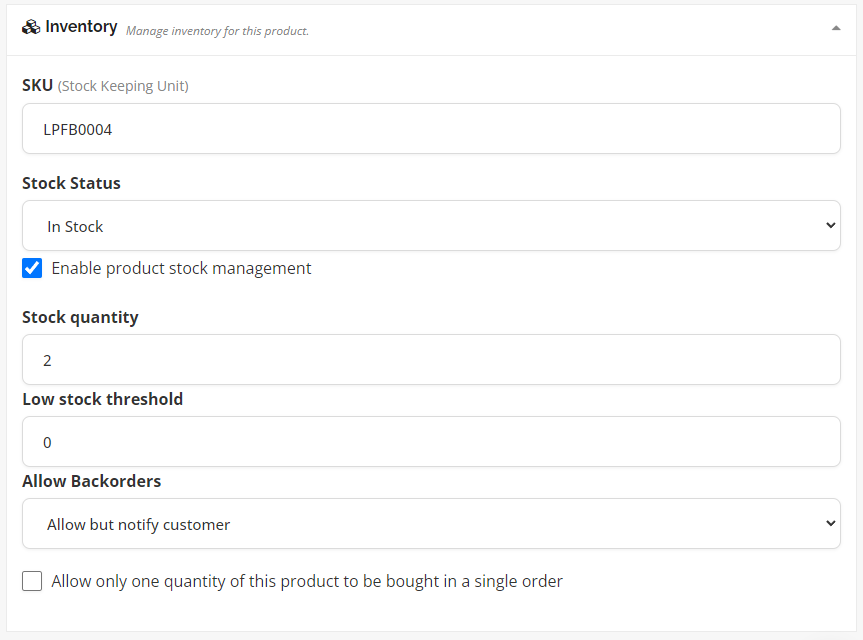
What is SKU?
SKU stands for Stock Keeping Unit. It should be a unique set of characters which will not match to any other product.
Enable Product Stock Management
Let's say you have 10 pieces of the product and you don't want to receive after orders are placed for 10 units. If you enable stock management and enter 10 in the quantity field, then after 10 units are ordered, this product will show a message that all the quantities are sold and there is no stock.
But, you might want to take some pre-orders before your next batch comes up. So you can Allow Back Orders to let the customers place orders even if the product is out of stock.
Downloadable Product
If you are selling photos, music, software or any digital product, then this is the option to use. If you click on the Add File button, three more fields will be added.
The name field defines what the downloaded file name should be. We are letting you define that because you might name the original file to something like “new-album-updated-jan-12.zip” and you want the user to download the file as “New Album”. So this option will be useful for you to serve and organize better.
If you are serving the files from your very own site, then you can click on choose file and select. But you can also serve the file from Dropbox, Google Drive or some other file hosting site you like.
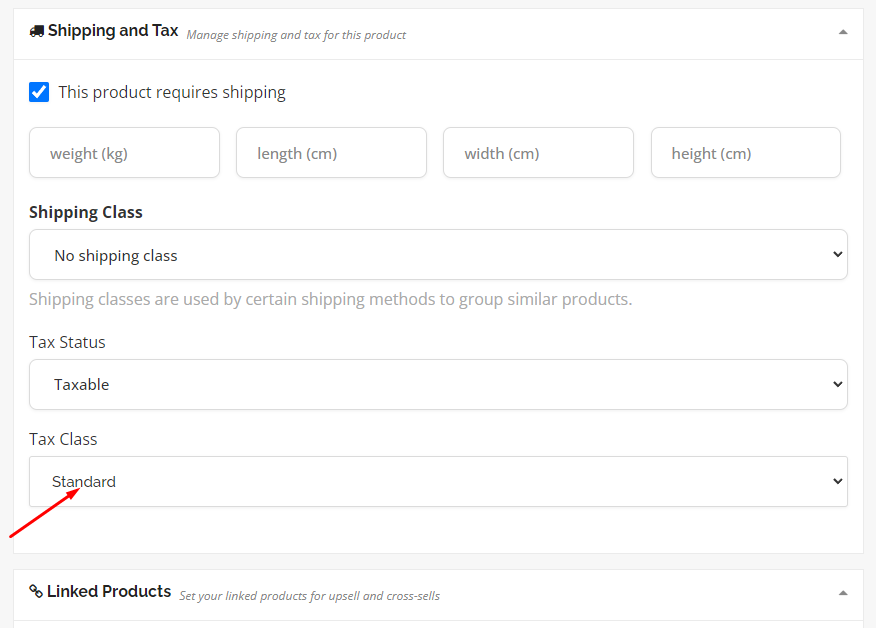
Shipping
There is a separate setting for global shipping that will apply to all of your products. Learn more in this article
But you will have the option to override the global shipping method and add a shipping option for a specific product.
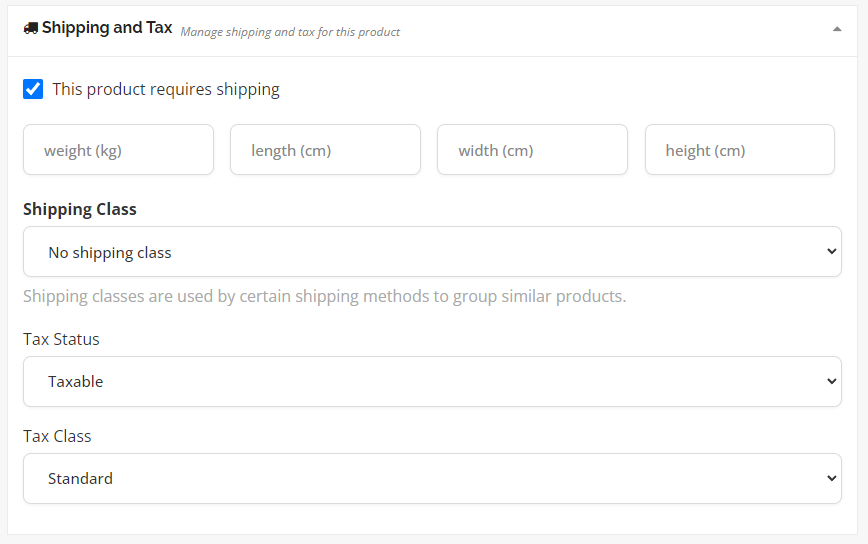
Tax configuration
Here you can only select the pre-made tax rate available. Choose Standard so the tax rate will be added to the customer cart based on the customer address.
Navigate to your Dashboard → Product and go to any product edit screen.
Select from the drop-down and hit Save. The taxes will be applied to the checkout page automatically.
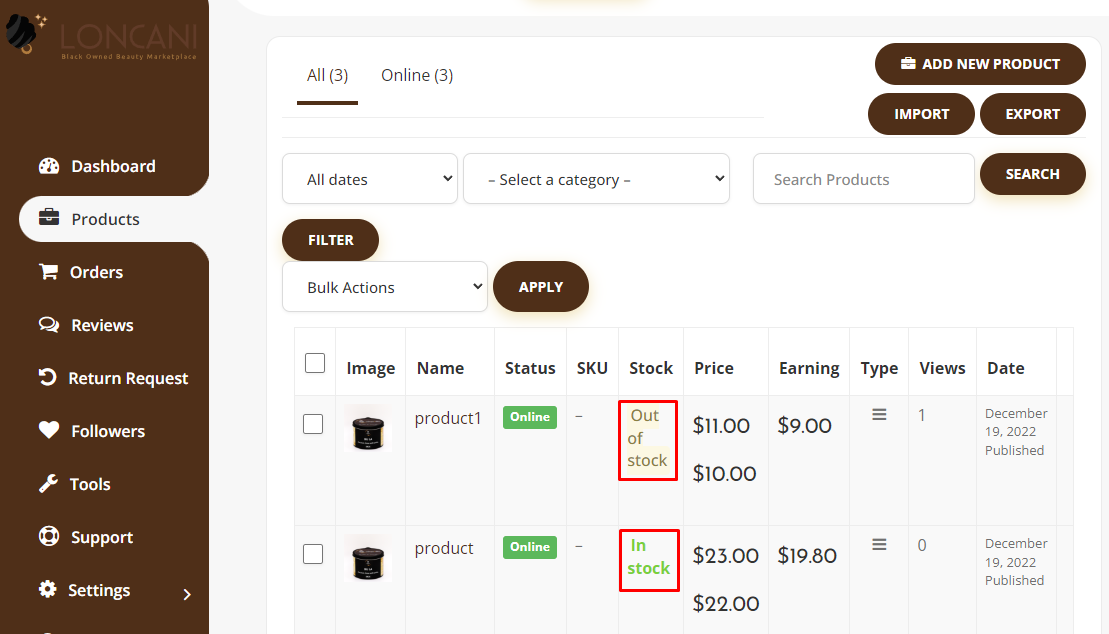
Filter Options for Product Listing Page
Now you can filter the products on your product listing page according to the product type. Just select the product type and click on Filter. You will see the filtered products on the list.
- In stock
- Out of stock